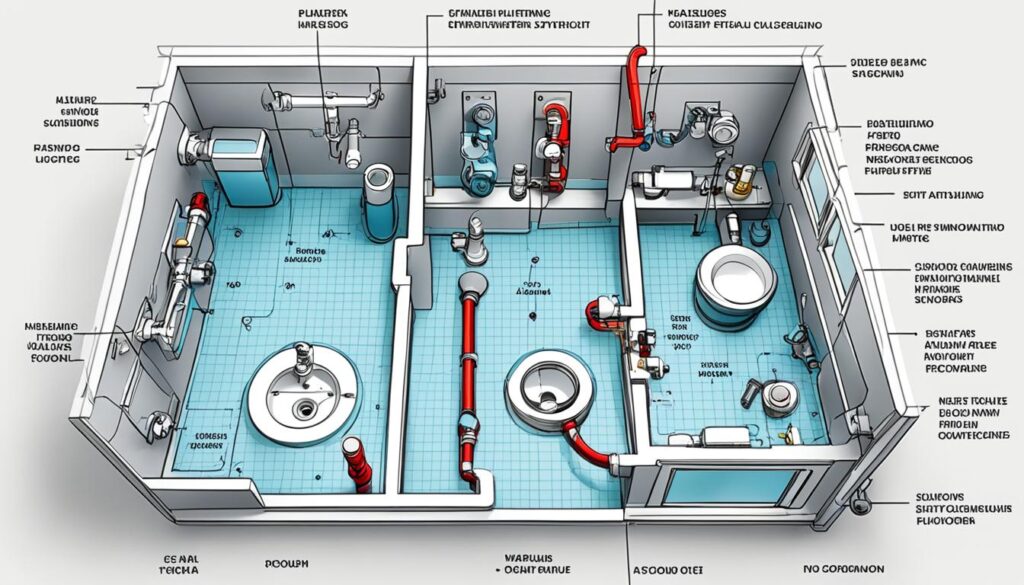
Ever thought how one bad pipe can mess up your whole bathroom? Knowing your bathroom’s plumbing layout is key when fixing or updating it. A good design makes sure drains, vents, and fixtures all work well together. This keeps your bathroom running smoothly. Building codes are important too. They set rules for where things go to make sure your bathroom is comfortable and works right. For example, toilets and sinks need to be set a certain distance apart to have enough space for use12. By learning more about plumbing layouts, you’ll see how to pick the best materials and venting methods. This helps build a system that lasts a long time.
Key Takeaways
- The layout bathroom plumbing diagram is vital for a functional and efficient bathroom design.
- Local building codes dictate essential dimensions and spacing for plumbing fixtures.
- Integrating proper venting within a few feet of each fixture is crucial.
- Standard dimensions, like a 5×8-foot bathroom, help accommodate essential fixtures comfortably.
- Choosing the right materials, such as PEX or copper for water supply lines, ensures durability.
- Addressing common pitfalls in plumbing design can prevent costly issues in the future.
Understanding Bathroom Plumbing Layout Fundamentals
Learning bathroom plumbing basics is key for a good design and function. A solid plumbing plan includes pipes, drains, and where fixtures go. Wet walls are important as they cut down on the pipes needed by hosting water-related fixtures3 and4.
A typical bathroom plumbing design uses 3-inch PVC pipes for the main drain. It also has copper pipes that are 1/2-inch across for the water5. DWV fittings, which vary from 1.25” to 24”, help with efficient drainage3.
The sewer line is usually bigger than water lines, being about 4.25-4.5 inches. Water pipes, on the other hand, range from 0.5-1.5 inches3.
Venting is crucial for bathroom plumbing. Vents should be 6 inches above flood level for best performance4. For a good flow, horizontal drain pipes need a 0.25-inch slope per foot3 and5. Knowing these rules helps make a good bathroom plumbing layout.
Importance of a Well-Designed Bathroom Plumbing Diagram
A well-crafted bathroom plumbing diagram is key for smooth water flow and function. It makes sure the bathroom’s plumbing meets local rules, avoiding blockages and pricey fixes. With such a diagram, homeowners can see the layout and use space well. This improves comfort and makes upkeep easier.
Following plumbing codes impacts the design. For example, the International Plumbing Code (IPC) says the bathroom sink’s drain must be 18 inches off the floor. There must be 30 inches of space next to the vanity6. The diagram should show a 1.5-inch fitting for the sink, using specific parts like trap adapters6.
Ignoring these rules can cause delays or extra costs since fixtures need enough space. A bathroom must have room for all standard fixtures. For instance, a normal tub requires a space of 60 by 32 inches, with an extra 4 inches for tiles7.
Good drainage depends on the right pipe sizes. Main drain PVC pipes should be 3 inches, with vents at 2 inches7. Knowing these details helps with maintenance and efficiency later. Thus, a thorough bathroom plumbing plan can save time and money, improving home life quality.
Key Elements of a Bathroom Plumbing System Diagram
To create an effective bathroom plumbing system diagram, you need to know the key elements bathroom plumbing. This includes figuring out where to place toilets, sinks, and tubs. This placement affects the plumbing fixtures layout. For toilets, common measurements are 10, 12, and 14 inches from the wall. Most toilets use the 12-inch distance8. It’s vital to measure and position these elements well for your design to work.
Every fixture must be the right size. This includes making sure drain and vent pipes are correctly sized. Plumbing plans must be drawn with care to avoid any surprises later. If done right, these plans can make renovations easier and cheaper9. A clear diagram helps understand how everything works together. It also helps you follow building codes for plumbing8. These codes keep you out of trouble and make sure your plumbing is safe.
The materials you choose for your plumbing matter a lot too. Pipes that carry water to the shower can be made from copper, PEX, or CPVC. These systems need water supply lines, shut-off valves, and shower heads10. Knowing about these parts helps with planning and installing your plumbing right.
Planning the Ideal Layout Bathroom Plumbing Diagram
Designing a bathroom’s plumbing layout takes careful planning. You need to check the existing plumbing and fixtures to see what space you have. This helps make the renovation smooth, ensuring everything works well and follows the rules.
Assessing Existing Plumbing and Fixtures
Starting a bathroom redo means looking closely at what plumbing you already have. Check if toilets are the modern 12 inches size or the older 10 inches. Sinks should be about 31 inches high to follow standards, with their edges 34 inches from the floor for easy access11. The shower’s water line should be 80 inches up, and tub faucets 20-22 inches off the ground. Also, make sure shower doors can open wide, at least 24 inches for easy entry11.
Best Practices for Fixture Placement
Following good plumbing layout tips can make your bathroom more useful. Place sinks, toilets, and tubs near the main water wall to save on piping. Keep enough space around toilets—15 inches from their centers and 24 inches in front—for comfort and to meet standards12. Always test the plumbing setup for leaks before finalizing. A building inspector will check this too11.

Common Bathroom Plumbing Design Mistakes to Avoid
Renovating a bathroom has its rewards, but watch out for common bathroom plumbing design mistakes. Issues like not spacing fixtures properly can cramp your style. It’s important to measure the space between fixtures for the best use and movement.
Another big mistake is poor venting in the plumbing. Vent pipes let air in, keeping pressure balanced and things flowing right. This setup stops bad smells and keeps your bathroom fresh.
Ignoring plumbing codes can bring trouble beyond just a bad look. These rules make sure plumbing works as it should. Knowing these codes saves you time and money later.
Planning your bathroom’s look and function is key. Keep toilets close to soil pipes and other fixtures within reach for good drainage13. Setting aside extra money, between 5% to 25% of your budget, can cover any surprises13.
Talking to experts can make a huge difference, especially with big changes. They ensure your bathroom is both beautiful and practical. Good lighting and enough storage make the final result even better. Find out how to dodge these mistakes at this link.
Essential Bathroom Plumbing Rough-In Dimensions
Knowing the key rough-in measurements for bathroom plumbing is very important. It helps in setting up an efficient space. These measurements guide where to place bathroom fixtures. They make sure everything meets the needed clearances and local rules.
Standard Measurements for Toilet, Sink, and Tub
For toilets, the common rough-in distances from the wall are 10, 12, and 14 inches. Yet, 12 inches is most often used14. The spot for the toilet’s water line should be 8 1/4 inches above the ground15.
When it comes to sinks, the fittings for faucet and drain need two holes. These holes should be 4 inches to each side of the drain’s center. And, they need to be 2-3 inches above the drain14. A space of at least 21 inches clear in front is needed. But, 30 inches is better for easy use15.
Maintaining Required Clearances
Clear spaces around fixtures are vital for a good bathroom design. Toilets, sinks, and tubs need at least 18 inches clear in front15. For the sides, at least 15 inches from the center is required. Though, 20 inches is preferred for more space15.
The shower head should be placed at a height of 80 inches off the floor. This height allows for comfortable showering14. Following these clearance rules makes sure the bathroom is safe and comfy to use.
| Fixture | Common Rough-In Dimensions | Recommended Clearances |
|---|---|---|
| Toilet | 10″, 12″, or 14″ from wall; supply line at 8 1/4” above floor | Minimum front buffer: 21″, recommended: 30″ |
| Sink | 4″ left/right from drain centerline, 2-3″ above drain | Minimum side buffer: 15″; recommended: 20″ |
| Shower Head | 80″ from floor | Minimum front buffer: 18″ |
| Bathtub | Faucet valves: 20-22″ above floor | Minimum front buffer: 18″ |
Creating an Efficient Plumbing Layout for Bathroom Remodel
An efficient plumbing layout is key for a good bathroom remodel. It makes the best use of space while cutting costs. The common “three-in-a-row” bathroom setup spans about 40 square feet16. It places all elements on one wall, making installation easier and cheaper.
Space planning is crucial. A larger bathroom may fit two sinks and use pocket doors for privacy in the toilet and shower areas16. This setup makes plumbing simpler and looks great.
Moving fixtures like sinks isn’t too hard if they don’t go far. But, changing drains and vents needs careful planning17. Moving toilets is pricier because of complex plumbing needs such as slope and structural fits. The “Hotel Special” layout offers a lot of counter space but can make toilet placement tricky, showing design’s importance16.
Right sizes matter a lot. Following fixture size guidelines helps everything work better. For example, having 21 inches clear in front of a toilet makes it more comfortable. A minimum bathtub length of 60 inches is easier to use18. Using up-to-date plumbing parts and keeping enough space around fixtures leads to a modern, efficient layout.
Making digital plumbing plans helps imagine new designs and talk about project details. It allows homeowners to compare changes with what’s already there and improve their bathroom remodel plumbing17.
Understanding Bathroom Plumbing Drainage Systems
Bathroom drainage systems are key to efficiently remove wastewater. They stop plumbing problems before they start. The type of drain pipes used and their setup is very important. Pipes can be made from materials like PVC or cast iron. They have specific sizes for good performance. For example, drain traps are usually 1-1/4 to 2 inches in diameter. Branch drain lines often measure 1 1/2 to 2 inches. The main lines, which carry waste away, are typically 4 inches wide. They might be made from ABS or clay, depending on local rules1920.
Types of Drain Pipes and Their Specifications
Different drain pipes have unique characteristics and specs. These affect how well they work. Plumbing codes like the UPC set strict rules for slopes and lengths of trap arms, more so than the IPC. These standards help drains run smoothly21. Knowing these specs is crucial for new setups and fixing old ones. Bad drainage can mean expensive repairs later.
Connecting Drains to Main Lines and Venting
It’s important to connect bathroom drains to main sewer lines correctly. Vent pipes are vital here. They release sewer gas and keep harmful microbes out of the house. Following plumbing rules for these connections can prevent problems. Issues like slow draining or sewage backup signal bigger problems2120.
FAQ
What is a layout bathroom plumbing diagram?
Why is it important to have a well-designed bathroom plumbing diagram?
What are the critical components of a bathroom plumbing system diagram?
What are common mistakes to avoid in bathroom plumbing design?
What are the essential rough-in dimensions for bathroom plumbing?
How can I optimize a plumbing layout for a bathroom remodel?
What types of drain pipes are commonly used in bathroom plumbing systems?
How do I connect drains to main lines while ensuring proper venting?
Source Links
- https://www.bhg.com/home-improvement/plumbing/bathroom-layout-specs/
- https://www.plumbwize.ca/blog/plan-bathroom-plumbing-layout/
- https://www.archdaily.com/985820/bathrooms-basics-6-tips-to-plan-your-bathroom-plumbing-and-layout
- https://www.diychatroom.com/threads/basement-bathroom-drain-layout.758953/
- https://www.kevinszabojrplumbing.net/blog/2022/9/6/plumbing-diagrams-and-layouts-for-bathroom-the-ultimate-guide
- https://www.hammerpedia.com/how-to-plumb-a-bathroom/
- https://plumbers911.com/bathroom-plumbing-diagram/
- https://www.kingstonbrass.com/blogs/blog/bathroom-plumbing-rough-in-dimensions
- https://www.bhg.com/home-improvement/plumbing/how-to-draw-a-plumbing-plan/
- https://thelenmechanical.com/blog/shower-plumbing-diagram/
- https://www.homedepot.com/c/ab/bathroom-plumbing-rough-in-dimensions/9ba683603be9fa5395fab901b9624727
- https://www.plbg.com/forum/read.php?1,653673,653727
- https://www.loveproperty.com/gallerylist/71172/50-mistakes-to-avoid-when-designing-a-bathroom
- https://www.kingstonbrass.com/blogs/blog/bathroom-plumbing-rough-in-dimensions?srsltid=AfmBOooaeaZ2AUDEs0oC78-3HYubNF0_Se7d36mjj1CHy1uxLPgxVvI2
- https://www.thespruce.com/plumbing-rough-in-dimensions-guide-1822483
- https://www.boardandvellum.com/blog/common-bathroom-floor-plans-rules-of-thumb/
- https://blog.magicplan.app/plumbing-reconfiguration-planning
- https://www.thespruce.com/free-bathroom-floor-plans-1821397
- https://harrisplumbing.ca/how-your-home-plumbing-system-works/
- https://www.thespruce.com/know-your-house-drainage-system-1822515
- https://terrylove.com/forums/index.php?threads/help-with-drain-vent-layout-for-plumbing-project.90583/


